Introduction
Wind speed is measured with an anemometer. The most common type of anemometer is the cup anemometer, in which hemispherical hollow cups are mounted at the ends of a three- or four-armed star and are set in rotation by the wind. The wind speed is determined from the rotational speed.
In the smart home, the wind speed can be used, for example, to retract an awning or external blinds in good time before they are damaged in a storm. It is also needed to calculate the feels-like temperature (wind chill).
Available measurements
| Variable | Unit | Source | Description |
|---|---|---|---|
| beaufort | Bft | Measurement | Wind force |
| windchill | °C | Calculated | Wind chill (feels-like temperature) |
| windgust_max10m | km/h | Measurement | Max. wind gust last 10 min. |
| windgust_max2m | km/h | Measurement | Max. wind gust last 2 min. |
| windgust_maxdaily | km/h | Measurement | Max. wind gust current day |
| windrun_daily | km | Measurement | Wind run current day |
| windspeed | km/h | Measurement | Wind speed |
| windspeed_avg10m | km/h | Measurement | Avg. wind speed last 10 min. |
| windspeed_avg2m | km/h | Measurement | Avg. wind speed last 2 min. |
Sensor used
We use the high-quality aluminium wind speed sensor from ComWinTop/Renke (CWT-SWS-A-A) with analog 0-5 V output. The build quality is very high: aluminium housing, the sensor is completely protected against moisture by O-ring seals in the housing and connector. Measurement is contactless (no mechanical reed switch), which speaks for a long service life.
Datasheet
Specification
- Measuring range: 0-60 m/s
- Resolution: 0.1 m/s
- Accuracy: ±(0.2 + 0.03 · V) m/s
- Starting speed: ≤ 0.2 m/s
- Output: 0-5 V (analog)
- Supply voltage: DC 10-30 V
- Power consumption: ≤ 0.1 W
- Response time: ≤ 1 s
- Operating range: −20 … +60 °C / 0-80 % RH
- Dimensions: Ø 222.6 mm, height 178.8 mm
Parts list
Available as a kit
All necessary components of this guide are also available as a complete kit! The kit contains all individual components (except adhesives, solder, etc.) – including the required PCBs and 3D printed parts. With your purchase you also support us in the further development of the DIY weather station.
Request a kit ›| Quantity | Component | Source |
|---|---|---|
| 1 pc. | ComWinTop / Renke wind speed sensor (aluminium, analog 0-5 V), CWT-SWS-A-A | Ali Express / Amazon |
| 1 pc. | 3D printed adapter / housing wind sensor | see below |
| 4 pcs. | Stainless steel button head screw DIN7380, M4×16mm | Ali Express / Amazon / hardware store |
| 4 pcs. | Stainless steel hex nut M4 | Ali Express / Amazon / hardware store |
| 4 pcs. | Stainless steel washer M4×9×0.8mm | Ali Express / Amazon / hardware store |
| 1 pc. | Stainless steel countersunk screw DIN7991, M8×20mm | Ali Express / Amazon / hardware store |
| 1 pc. | Stainless steel hex nut M8 | Ali Express / Amazon / hardware store |
| 1 pc. | Stainless steel washer M8×16×1.5mm | Ali Express / Amazon / hardware store |
| 1 pc. | Swivel pipe clamp, 25-28mm / 3/4″ | Ali Express / Amazon / hardware store |
| 4 pcs. | Cable ties 3×150mm, UV-resistant | Ali Express / Amazon / hardware store |
| 1 pc. | Cable gland IP68, PG07 (M12) | Ali Express / Amazon / hardware store |

3D printed parts and PCB
The wind sensor is attached to the mounting system via a 3D printed adapter. The adapter holds the sensor base and is fixed to the mast with a swivel pipe clamp.
The 3D print files can be downloaded here: https://github.com/mschlenstedt/WeatherLox/tree/main/case/weatherlox-wind

Required tools and consumables
- Allen keys or wrenches (M4, M8)
Assembly instructions
Mount the control unit first
This guide assumes that you already have a working control unit! So, if necessary, start with the control unit before assembling this sensor module.
First, the pipe clamp is attached to the 3D printed adapter. To do this, pass the M8 screw through the middle of the adapter and secure it from below with a washer and nut. The pipe clamp is then attached to the screw.
The sensor is then attached to the adapter with the 4 M4 screws and secured from below with a washer and lock nut.
The cable is now routed neatly down to the control unit (note: the cables should only be fixed with cable ties once the assembly of the entire weather station has been completed – this way cables can be bundled). The cable is fed into the control unit with a downward loop. This ensures that dripping water that collects on the cable is directed away from the cable gland. The cable is shortened accordingly and stripped for approx. 10 cm inside. This leaves enough reserve for routing.
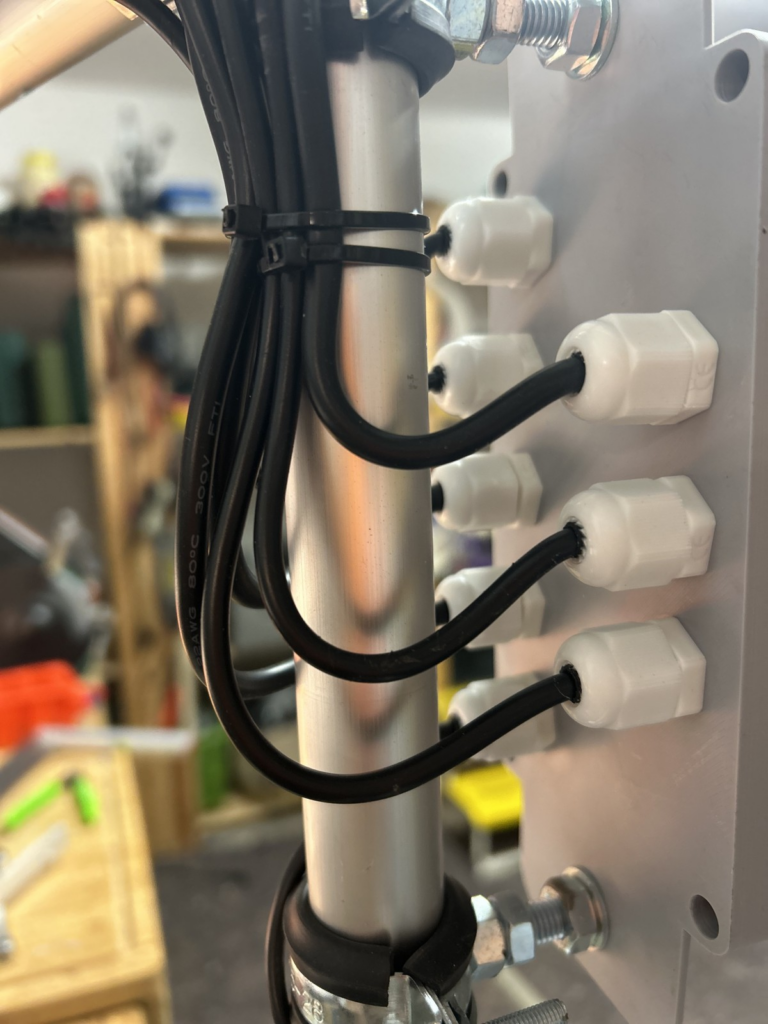
Then the cable is connected to the control unit at the terminals labelled “WindS”. Disconnect the control unit from the power supply first!
- WindS1: brown
- WindS2: black
- WindS3: blue
- WindS4: yellow

The control unit can now be supplied with power again. Now check once more whether the corresponding readings are displayed in the Devices tab. To do this, turn the sensor and check at task 10 (ads1115_1) whether the voltage value raw_windspeed changes. Once the function test is complete, the assembly is already done!
